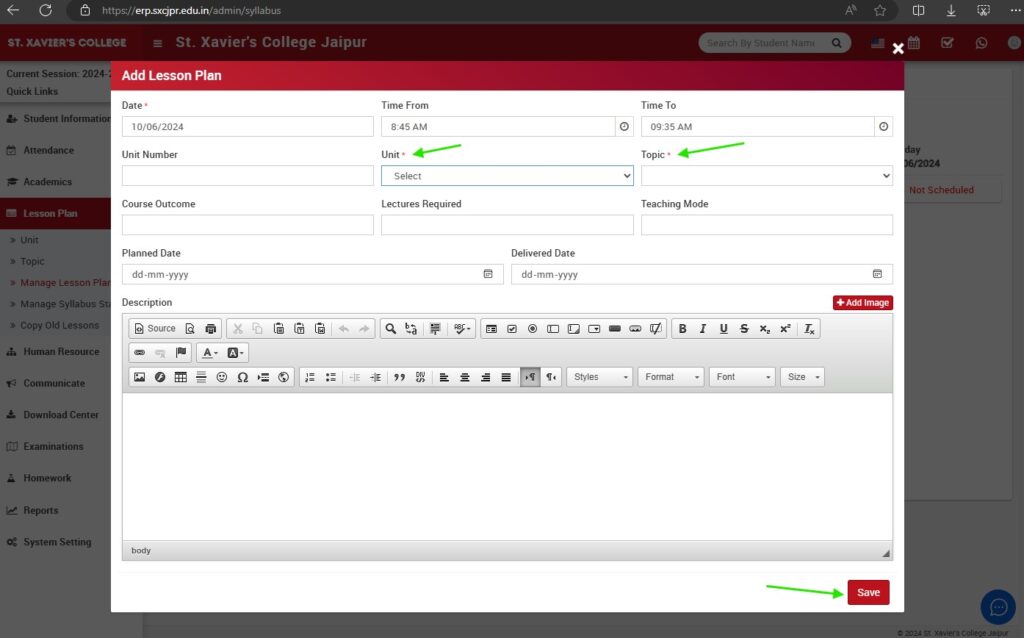
Adding a lesson plan in the ERP system for St. Xavier’s College Jaipur involves two main steps: first, adding units and topics, and then creating the lesson plan itself. Follow the steps below to complete this process:
Step 1: Add Units
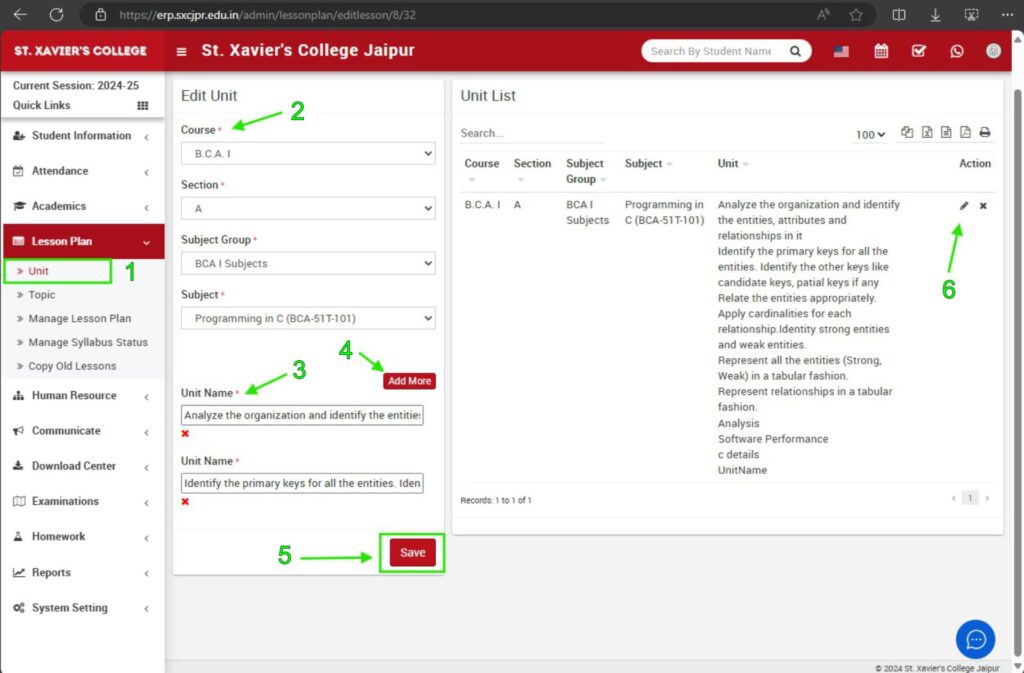
- Locate the main menu on the dashboard.
- Click on the “Lesson Plan” option.
- In the dropdown menu, select “Unit.”
- Select the course, section, subject group, and subject.
- Enter the unit name and click on the “Add More” button to add additional units if needed.
- Click on the “Save” button.
Step 2: Add Topics
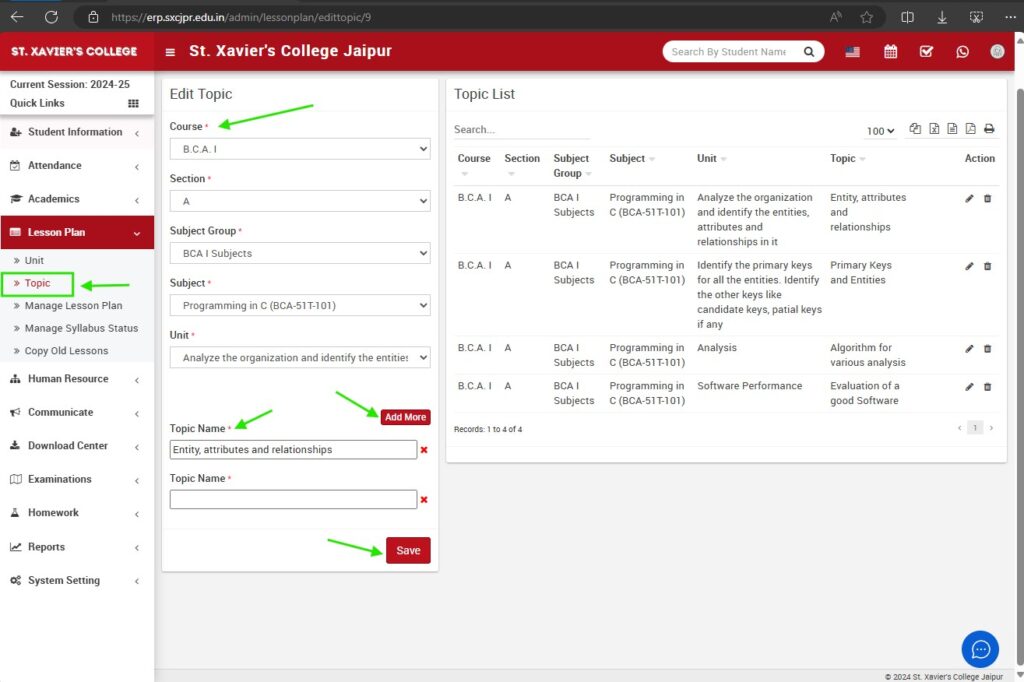
- Navigate back to the “Lesson Plan” menu.
- In the dropdown menu, select “Topic.”
- Select the course, section, subject group, and subject.
- Select the unit for which you want to add topics.
- Enter the topic name and click on the “Add More” button to add additional topics if needed.
- Click on the “Save” button.
Step 3: Add Lesson Plan
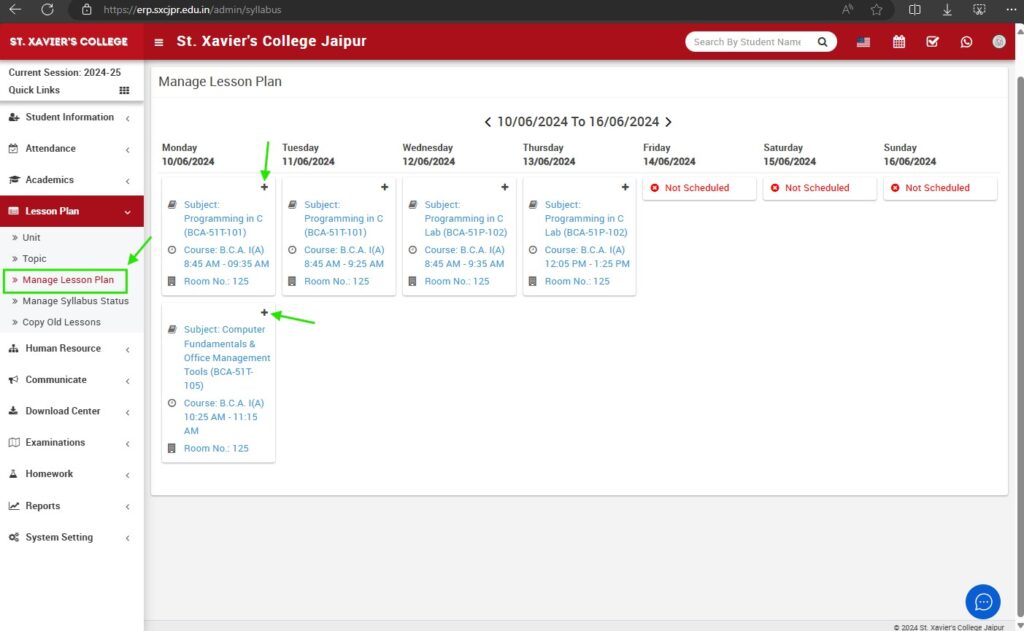
- Navigate to the “Lesson Plan” menu.
- In the dropdown menu, select “Manage Lesson Plan.”
- On the Manage Lesson Plan page, find the date and time slot for which you want to add the lesson plan.
- Click on the plus button (“+”) to add a new lesson plan.
Step 4: Enter Lesson Plan Details
- A form will appear where you need to enter the lesson plan details.
- Enter the date, time from, time to, select the unit and topic, and fill in other required fields such as course outcome, lectures required, teaching mode, and description.
- Click on the “Save” button to add the lesson plan.
Additional Tips
- Editing Units or Topics: To edit units or topics, navigate to the respective section under the Lesson Plan menu, select the unit or topic, make the necessary changes, and save.
- Viewing Lesson Plans: You can view and manage all lesson plans by navigating to the “Manage Lesson Plan” section under the Lesson Plan menu.


